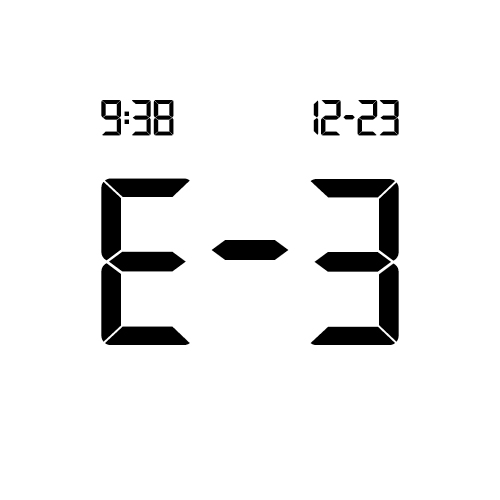
The Accu-Chek Guide Link meter uses Accu-Chek Guide test strips.
Performing a control test lets you know the meter and test strips are working properly.
Reasons to perform a control test, but are not limited to:
1. You open a new test strip box.
2. Your test result does not match how you feel.
3. The test strips were stored in extreme temperatures or high humidity.
4. The test strip container was left open.
- Check the Use By date on the test strip container and the control solution bottles. Do not use test strips or controls past the Use By date. Controls expire three months from the date of opening.
- Remove the control bottle cap. Wipe the tip of the bottle and discard the first drop of the solution into a tissue.
- Inert the metallic end of the test strip into the meter. The meter turns on. Place the meter on a flat surface.
- Apply the control solution you want to test, using either Level 1 or Level 2 control solution.
- When you see the flashing blood drop appear on the display, squeeze the bottle until a tiny drop forms at the tip of the bottle.
- Touch the drop to the yellow edge of the test strip.
a. Do not put the control solution on top of the test strip. The flashing hourglass appears when you have enough solution in the test strip. - The control result, the bottle symbol, and the flashing L1 or L2 appear on the display.
- Press the left or right arrow buttons to alternate between L1 and L2.
- Press and release the power button on the side once the correct L1 or L2 is displayed on the screen.
- “OK” appears if the control result is within range.
- “Err” appears if the control result is out of range. - Wipe the tip of the bottle with a tissue and cap the bottle tightly.
You can also confirm your control results are within range by referring to the Control level 1 and Control level 2 ranges printed on the test strip container.
If the control results are “Out of Range,” reference the Troubleshooting Checks table below.
Please note that your data will not be lost when you remove the batteries from your meter.
1.Open the battery door on the back of the meter by pushing the tab in the direction of the arrow and pulling the door up.
2.Release the old batteries by pushing the release button.
3.Remove the old batteries.
4.Press and hold the power/set/ok button on the front of the meter for at least 2 seconds. Wait 20 seconds
5.Slide the new batteries under the black tabs with the (+) side facing up.
6.Put the battery door back in place and snap it closed.
There’s no need to manually code any of our meters, so you have fewer steps in testing.
Downloads & Guides
View and download the resources you need
Accu-Chek Newsletter
Stay informed about diabetes
Get diabetes management tips and news delivered right to your inbox.
Mon-Fri from 8am-9pm or
Sat-Sun from 9am-6pm
Holiday Hours
Thanksgiving Eve from 8am-6pm
Thanksgiving Day from 8am-4pm
Day after Thanksgiving from 8am-6pm
+44 (20) 23121343


